bench press mistakes

5 major mistakes during bench press

5 major mistakes during bench press. For over fifteen years, I’ve stood on the platform of countless gyms, my eyes scanning a landscape of iron and ambition. In that time, I’ve witnessed a single exercise command more respect, instill more fear, and build more raw upper-body power than any other: the bench press.

It’s the king of the weight room. The Sunday morning ritual. The universal metric of strength in casual conversation. But for all its glory, the bench press is also the most butchered, misunderstood, and ego-driven movement I’ve ever seen. I’ve watched talented athletes plateau for years and eager beginners flirt with disaster, all because of a handful of critical, repeatable errors.

The bench press isn’t just about lying down and pushing a bar. It’s a full-body skill that requires precision, patience, and a humble willingness to learn. Whether you’re a beginner trying to lift with confidence or an intermediate lifter stuck in a frustrating plateau, correcting these five major mistakes will not only skyrocket your numbers but, more importantly, keep you healthy and lifting for a lifetime.

Let’s get to work.


Mistake #1: The Floating Elbow Flaw (Poor Elbow Path)

What I See: The lifter lies down, unracks the bar, and lowers it straight down to their chest, with their elbows flared out at a 90-degree angle from their body. It looks like they’re trying to form a “T” with their torso and arms.

The Professional Breakdown:
This is, without a doubt, the most common and most dangerous mistake on this list. When your elbows flare out to your sides, you place your shoulder joints in a highly vulnerable position known as shoulder impingement. The head of your humerus (upper arm bone) shifts forward, crunching the delicate tendons of your rotator cuff against your acromion (a bony process on your shoulder blade). Do this repeatedly under heavy load, and you’re drafting a one-way ticket to chronic shoulder pain, tendinitis, and potentially a torn rotator cuff.

bench press mistakes

Beyond the injury risk, it’s biomechanically inefficient. In this position, you’re relying almost entirely on your pectoralis major and anterior deltoids, while largely disengaging the powerful latissimus dorsi muscles of your back.

The Fix: Create a Powerful “Bench Press Shelf”
Your goal is not to flare; it’s to tuck. As you lower the bar, your elbows should not be pointing directly out to the sides. Instead, they should track at a 45- to 75-degree angle relative to your torso.

  1. Engage Your Lats: Before you even unrack the bar, think about trying to squeeze a pencil between your armpits. This pre-activates your lats. Your lats are not just for pulling; they are crucial for stabilizing the shoulder during the press.
  2. Bend the Bar: As you grip the bar, imagine trying to bend it in half like a twig, pulling your hands apart. This external rotation torque will lock your shoulders into a safe, stable position and automatically engage your lats.
  3. Find Your Path: A good cue is to aim the bar for a point on your lower chest or sternum, not your upper chest or neck. To get there, your elbows must tuck back towards your torso. The movement should feel like you’re “pulling the bar apart” or “rowing the bar” to your chest.

The Result: You’ll instantly feel stronger and more stable. You’ve now created a “shelf” with your pecs to receive the bar, protected your shoulders, and engaged your back—turning a shaky upper-body move into a powerful, full-body lift.


Mistake #2: The Disconnected Body (Lack of Full-Body Tension)

What I See: A lifter lying flat on the bench, looking relaxed. Their feet are waving in the air or tucked up on the bench itself. Their back is flat, and their hips are loose. When they press, their entire body wobbles.

The Professional Breakdown:
The bench press is not an upper-body exercise. Let me repeat that: the bench press is not an upper-body exercise. It is a full-body movement. Every ounce of energy that leaks out of your body is an ounce of force lost from the bar. A disconnected, loose body on the bench is like trying to fire a cannon from a canoe—ineffective and unstable.

This lack of tension robs you of power and, once again, puts your shoulders in a precarious position. A flat back provides no foundation for the force your legs and hips can generate.

The Fix: Become a Human Spring
Your goal is to create maximum full-body tension from the moment you set up until the bar is racked.

  1. The Leg Drive: Place your feet firmly on the floor, slightly behind your knees. Your exact foot position will vary based on anatomy, but they should be solid and driving back into the floor, not straight down. This isn’t a leg press; it’s about creating full-body rigidity. As you press, drive your feet back as if you were trying to slide yourself up the bench towards the rack.
  2. The Arch: Create a slight, natural arch in your upper back. I am not talking about a powerlifting-level, extreme arch that compromises form. I’m talking about retracting your shoulder blades (think “proud chest”) and driving your upper back into the bench. This creates a stable platform and reduces the range of motion in a safe, effective way.
  3. The Squeeze: Squeeze your glutes hard. This stabilizes your pelvis and transfers the force from your leg drive up your kinetic chain. Your entire body should be tight: quads, glutes, core, back, and hands. You are a single, unified spring of potential energy.

The Result: The bar will feel lighter. Your press will be explosive and controlled. You’ll be shocked at how much more weight you can handle simply by being tight and connected to the bench.


Mistake #3: The Grip and Wrist Gambit (Improper Hand Placement)

What I See: A lifter using a thumbless, or “suicide,” grip because it “feels more natural.” Or, someone with the bar sitting high in their palm, causing their wrists to bend back dramatically.

The Professional Breakdown:
Your hands are the only point of contact with the bar. Get this wrong, and everything else falls apart.

  • The Suicide Grip: This is a catastrophic risk. By not wrapping your thumb around the bar, you are relying entirely on friction and the strength of your fingers to keep hundreds of pounds from dropping onto your face, throat, or chest. The name is not an exaggeration. It’s a matter of when, not if, this will fail.
  • Weak Wrist Position: When the bar sits high in the palm and the wrists collapse backwards, you lose a significant amount of force transfer from your forearm to the bar. It also places immense strain on the wrist joints and can lead to tendinitis or nerve issues over time.

The Fix: Build a Pillar of Support
Your grip and wrist should form a solid, neutral pillar of support.

  1. The Full Grip: Always, without exception, use a full grip. Wrap your thumb around the bar and lock it against your fingers. Grip the bar as if you’re trying to leave fingerprints in the steel.
  2. Stack Your Joints: The bar should sit directly in line with your forearm bones, not behind them. A great cue is to “break the bar” across your palm. It should sit in the meaty part of your palm, right on the heel of your hand. From the side, your knuckles should be pointing towards the ceiling, and your wrist should be straight and strong.
  3. Grip Width: A good starting point is a grip where, at the bottom of the movement, your forearms are perfectly vertical. Too wide, and you increase shoulder strain. Too narrow, and you turn it into a triceps-dominant exercise. Experiment within a moderate grip width to find what feels strongest and safest for your shoulder structure.

The Result: A safer, more powerful press. You’ll feel a direct line of force from your chest, through your solid wrists and forearms, and into the bar.


Mistake #4: The Bouncing Bar and the Half-Rep (Poor Range of Motion)

What I See: A lifter lowering the bar rapidly and using the elastic rebound off their sternum to propel it back up. Or, a lifter who only lowers the bar halfway before pressing it back up, boasting about a weight they cannot actually lift through a full range of motion.

The Professional Breakdown:
Ego is the enemy of progress. Bouncing the bar is a cheat that sacrifices muscle growth, strength development, and joint health for the illusion of lifting more weight. That violent impact can bruise your sternum, damage costal cartilage, and teach your nervous system a sloppy, uncontrolled movement pattern.

Half-reps (or partial reps) are equally problematic. While they have a place in advanced training protocols like board presses, consistently avoiding the full range of motion means you’re only strengthening a small portion of the lift. You’re building strong “partial” muscles and leaving the most challenging part of the movement—the bottom—chronically weak.

bench press mistakes

The Fix: Control the Descent, Own the Bottom
Strength is built in the struggle, not in the shortcut.

  1. Tempo is Key: Control the bar on the way down. A good tempo for most lifters is a 2-3 second eccentric (lowering) phase. This not only builds more muscle by creating time under tension but also ensures you are in complete control of the weight.
  2. Touch and Go, Don’t Bounce: The bar should touch your chest lightly, with no perceptible pause, but also with no bounce. Think of your chest as a hot stove—you touch it, but you don’t rest on it. From that touch, immediately drive the bar back up.
  3. Define Full Range: A full repetition is achieved when the bar touches your torso at the designated point (typically the sternum or lower chest for most lifters) without any significant change in your back arch or shoulder position. If you can’t touch your chest with a given weight without compromising form, the weight is too heavy. Lower the weight and build honest strength.

The Result: True, functional strength and significantly greater muscle hypertrophy. You’ll break through plateaus by strengthening the entire movement, not just the easy part.


Mistake #5: The Ego Lift and the Neglected Spotter

What I See: A lifter loading up 50 pounds more than they can handle, unracking it with a struggle, lowering it halfway in a shaky, uncontrolled manner, and then needing to be rescued by a spotter who performs 90% of the work for five “reps.”

The Professional Breakdown:
This mistake is the culmination of all the others, fueled by pride. Training should be a process of progressive overload, not a daily test of your one-rep max. Constantly attempting weights you cannot control is the fastest way to get injured, reinforce terrible technique, and stall your long-term progress. It’s not impressive; it’s irresponsible.

Furthermore, failing to use a spotter when attempting challenging weights—or not knowing how to spot correctly—is a critical safety failure. The bench press is one of the few exercises where failure can literally be life-threatening.

bench press mistakes

The Fix: Train Smart, Not Just Hard
Check your ego at the gym door. Your goal is long-term progression, not short-term validation.

  1. Program with Purpose: The vast majority of your training should be done with weights you can handle for the prescribed reps with perfect, or near-perfect, form. A good rule of thumb is to leave 1-2 reps “in the tank” on most sets. This is known as Training to Failure (TNF), and it’s far more sustainable and productive than constantly Training to Failure (TTF).
  2. Use a Spotter Intelligently: When you are attempting a heavy set of 3-5 reps, or any set where failure is a real possibility, always use a spotter.
    • How to Ask for a Spot: Be specific. “Hey, can you give me a spot for 5 reps? I might need a little help on the last one or two.” This tells the spotter exactly what you need.
    • How to Spot: The spotter’s job is not to lift the bar, but to assist just enough to help the lifter complete the rep. Place your hands under the bar, not on it. Let the lifter do the work, and only provide the minimal force necessary to keep the bar moving. Lift with your legs, not your back.
  3. Learn the Roll of Shame: If you’re alone and without a spotter, know how to fail safely. Don’t try to rack the bar behind your head. Instead, keep a firm grip and lower the bar to your chest. Then, roll it down your torso and over your hips as you sit up. It’s a hit to the pride, but it’s a safe exit strategy.

The Result: Consistent, uninterrupted progress. You’ll build real strength, avoid catastrophic injuries, and develop the discipline that separates serious lifters from the rest.

The Throne is Yours

The bench press is a magnificent tool for building a powerful, resilient physique. But like any powerful tool, it demands respect and mastery. By addressing these five critical mistakes—flaring elbows, a disconnected body, a poor grip, a bouncing bar, and ego-lifting—you are not just fixing your form; you are building a foundation for a lifetime of strength and health.

Forget the numbers on the side of the bar for a moment. Focus on the feeling. The feeling of tightness, of control, of power flowing from your toes to your fingertips. Master that, and the numbers will take care of themselves.

Now, go claim your throne.

Stay strong

creatine

Creatine for Sale in the USA (2025 Guide): Best Types, Prices & Where to Buy

Creatine is one of the most trusted and researched sports supplements in the world. If you’re looking for creatine for sale in the USA, you’ll find hundreds of options—but not all are created equal. This 2025 guide breaks down the different types of creatine, price ranges, and the best places to buy so you can make the right choice for your fitness goals.


What Is Creatine and Why Do Athletes Use It?

Creatine is a naturally occurring compound found in muscle cells. It helps produce ATP (adenosine triphosphate), which fuels short bursts of high-intensity exercise like weightlifting, sprinting, or HIIT workouts.

Athletes, bodybuilders, and everyday fitness enthusiasts take creatine because it:

  • Increases strength and power output.
  • Improves muscle recovery.
  • Enhances workout endurance.
  • Supports lean muscle growth.

This is why creatine remains the #1 selling performance supplement worldwide.


Types of Creatine: Which One Is Best?

When browsing creatine for sale, you’ll see different forms. Here’s what you should know:

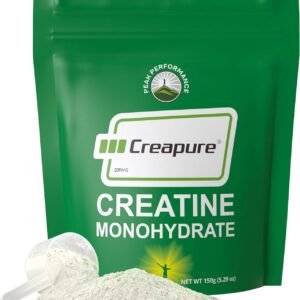
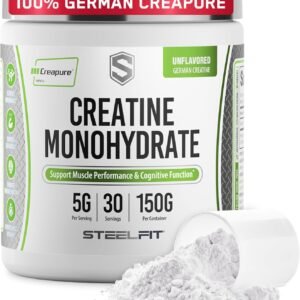
1. Creatine Monohydrate (Most Popular & Researched)

  • Purest, most affordable form.
  • Backed by 20+ years of scientific studies.
  • Proven to boost performance in nearly all athletes.
  • Best choice for 90% of users.
creatine

2. Creatine HCL (Hydrochloride)

  • More soluble in water.
  • May reduce stomach bloating or water retention.
  • Often more expensive per serving.

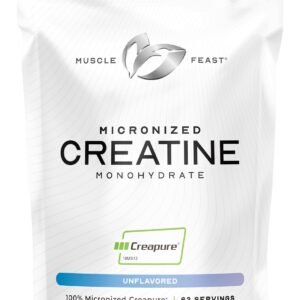
3. Micronized Creatine

  • A finer powder version of monohydrate.
  • Mixes easier and absorbs faster.
  • Slightly higher price than standard monohydrate.

👉 Best Choice for Most Athletes in 2025: Creatine Monohydrate remains the gold standard—cost-effective, safe, and highly effective.


Price Breakdown: Online vs. Retail Stores

Prices vary depending on the form, brand, and where you buy creatine. Here’s a quick comparison:

Type of CreatineAverage Price (Online)Average Price (Retail Stores)Servings (Approx.)
Creatine Monohydrate$20 – $35$30 – $4580 – 100
Micronized Creatine$25 – $40$35 – $5080 – 100
Creatine HCL$30 – $55$40 – $6560 – 90

💡 Tip: Buying online usually saves money because of bulk options and frequent discounts.


Where to Buy Creatine Safely in the USA

When searching for creatine for sale, make sure you purchase from trusted retailers to avoid counterfeit or low-quality products. Check also right dosage of creatine per day for gym goers.

creatine
  • Amazon: Huge selection, fast delivery, and customer reviews to guide your choice.
  • Walmart: Convenient for in-store pickup and nationwide availability.
  • Specialty Shops (like GNC, Vitamin Shoppe): Good for talking to staff and checking products in person.
  • [Your Store]: Buy directly from a specialized supplement retailer for guaranteed authenticity, curated selections, and exclusive deals.

Final Thoughts

If you want the best creatine for sale in the USA, stick with trusted brands and buy from reliable sources. Creatine monohydrate offers the best value and results for most athletes in 2025.

👉 Ready to get started?
Shop creatine now and fuel your next workout with the most effective supplement on the market.

Learn more: differences creatine monohydrate vs creatine HCL

Select the fields to be shown. Others will be hidden. Drag and drop to rearrange the order.
  • Image
  • SKU
  • Rating
  • Price
  • Stock
  • Availability
  • Add to cart
  • Description
  • Content
  • Weight
  • Dimensions
  • Additional information
Click outside to hide the comparison bar
Compare
Shopping cart close